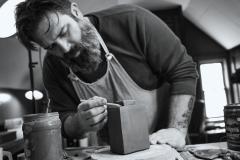
Ceramics is difficult enough. Our work is always on the cusp of failure; it will crack, warp, dunt, or explode. We, potters, have grown accustomed to disappointment because of the regularity of failure within our process. Since my time in production, I have tried to simplify whenever I can. The less I handle my work, the more successful it will be. OHIO, Only Handle It Once, is my motto. My current research is an ongoing development of a porcelain clay body that matures at an extremely low temperature, thus simplifying my process and curbing my disappointment. To understand and appreciate this research, clarifying some aspects of ceramics for the uninitiated is important.
First, to most of the ceramics community, Porcelain (with a capital P) is high-fire. This means that when we use the word "porcelain," it implies that the work has been fired to at least cone 10. Traditional porcelain is a type of clay with few impurities, which would lower the melting point, so it must be fired extremely high to vitrify (harden and increase density in) the clay to ensure it is not porous. Second, fired, porous clay is the devil. Most functional ceramics have a porosity between 1% and 3%, but some earthenware clays can be as high as 20% after they are fired. Third, Egyptian paste uses a process in which soluble salts are added to liquid clay, which in turn produces a glossy surface on fired ceramics. Finally, soft-paste porcelain was used in sixteenth- and seventeenth-century Europe to replicate authentic Chinese porcelain. Because of the poor elasticity, soft-paste porcelain was limited to casting and could not be hand-built or thrown on the potter’s wheel.
Like all my work, the development of this clay has been an organic process. In 2011, I set out to develop a black, high-fire, self-glazing clay to expedite a large project I was working on in graduate school. My initial tests were based loosely on the process of making Egyptian paste using soda ash as a primary flux in the clay body. I experienced some success but abandoned the clay because soda ash overly complicated the drying and wreaked havoc on my skin. In the summer of 2017, I came across my old notes while cleaning my studio and decided to incorporate this research into my Raw Materials class in the upcoming semester. The first assignment in Raw Materials is high-fire clay formulation, so I shared the previous research with my students to gauge their level of interest. One student in particular, Sara Driggers, was interested and began working on numerous self-glazing high-fire clay recipes of her own in class. Clay and glaze development in general is an extremely time-consuming and detail-oriented process, so I was pleased when Sara agreed to assist in my research.
We began by altering some of my old high-fire recipes and then substituting various fluxes. After a few weeks of experimenting, we noticed that several of the recipes looked more promising at cone 08 than at cone 10. For most of my career, I have identified myself as a "high-fire" clay artist, and I admit to some ceramic snobbery against low-fire in the past. I mention this in relation to this research because, with all my previous research in the high-fire realm, it was a difficult step for me to accept that the low-fire work seemed more hopeful. However, I could not ignore the results and, by midterms, I had gone all in with the low-fire crowd.
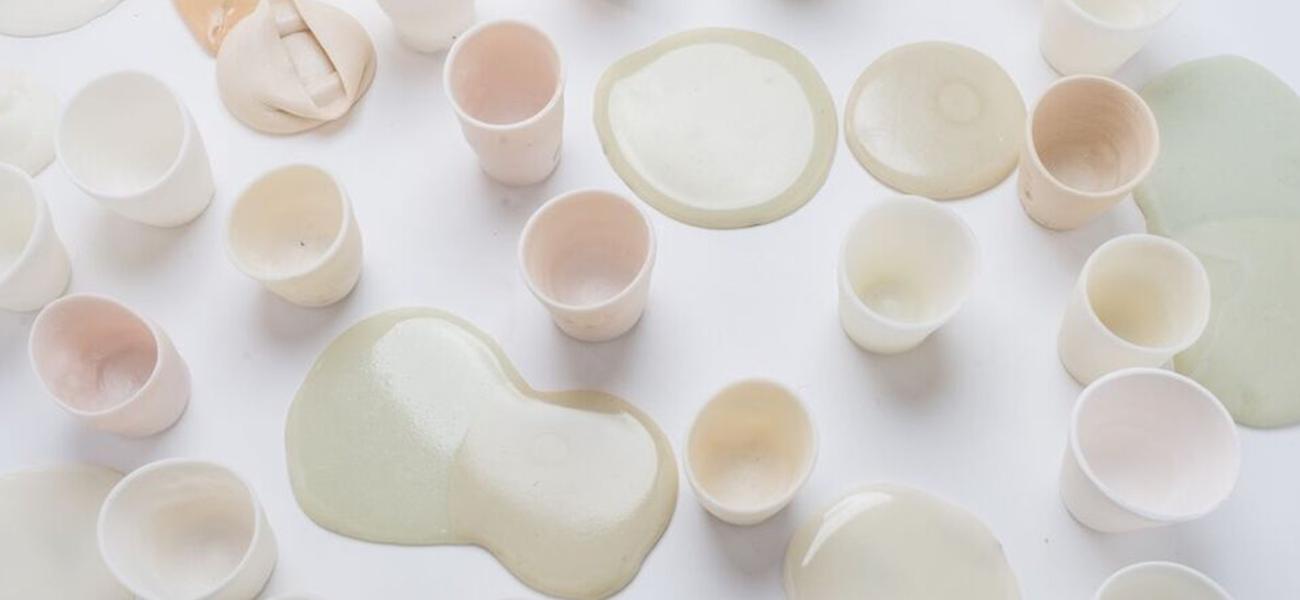
Our new goal was black, vitreous, self-glazing, low-fire clay at cone 04 or less. My plan was to first make a successful white clay body and then add colorants to the clay recipes since colorants can be expensive and do not dramatically affect the firing range. The ironic twist of the project was the discovery of a translucent clay body. Translucency was not a criterion for my initial interest in this clay, but when our first batch of translucent clay was unloaded from the kiln, I was hooked. We mixed and tested twenty to thirty different low-fire recipes each week for the remainder of the semester, slowly zeroing in on a recipe. By finals week, we had developed numerous successful clay bodies, one of which is extremely white, translucent, indistinguishable from high-fire porcelain, has a 0.01% porosity, 13% shrinkage, and matures at the low temperature of cone 05.
The benefits of this clay for studio potters are mainly in the accessibility of porcelain-level results at an extremely low temperature. One of the drawbacks of traditional porcelain is that the temperature required to mature is at least cone 10 in a reduction (fuel-fired) atmosphere, which is inaccessible to many clay artists because of cost and kiln requirements. Cone 05 in an oxidation (electric-fired) atmosphere is desirable. Anyone with an electric kiln can reach this low temperature with ease. Although not my deciding factor in developing this clay, I would be remiss not to mention its environmental sustainability. Since it can be fired in an electric kiln, it is feasible that one could use sustainable sources, such as solar or wind energy, to fire and achieve these results, as Bryan Hopkins notes in his article “How Low Can You Go?”[1]
Conclusions after two years (2019)
As of fall 2019, I had been using this clay for about two years. These are my conclusions in real-world practice about the benefits and drawbacks of this material.
1. Save Some Time.
The first and most significant benefit is the obvious time savings from the clay’s capacity to be vitreous once-fired at earthenware temperature. Although this clay costs about three dollars per pound, it is considerably more expensive than all commercially prepared clays. However, I would argue that because the clay can be once-fired and can be self-glazed, the time and energy saved are worthwhile and cost-effective. There are significant time and monetary savings because there is no glaze to mix, no glaze to apply, no glaze kiln to load, and no glaze kiln to fire. The older I get, the more obvious it seems that any amount of time I can save is well worth the monetary expense.
2. Coloring is Easy.
In October 2019, my student, Madeline Consugar, began expanding the color palette. Using her skills in color mixing, she mixed fifty color variations on previous colored-clay recipes. Mason stains and oxides can be added from .2% up to 10% with excellent results. Keep in mind that the light-colored recipes keep their color after firing, not only because of the low temperature but also because of the whiteness of New Zealand China Clay and Macaloid. Furthermore, if these recipes are mixed like a slip, they can easily be applied to leather-hard ware and produce a wide range of colors.
3. Stain the Surface
Since the number eight-seven recipe is self-glazing, it is possible to apply stains and oxides directly to greenware without them wiping off after firing. This allows for easy incorporation of color and decoration. The process is similar in feel to underglaze painting on majolica. The difference is that there is no "stickiness" to decorating brushes with oxides, unlike underglazes or colored slips. The feel is more like that of ink painting. The most notable difference is that it is easy to wipe off mistakes and reapply decorations.
4. Big Work will Slump
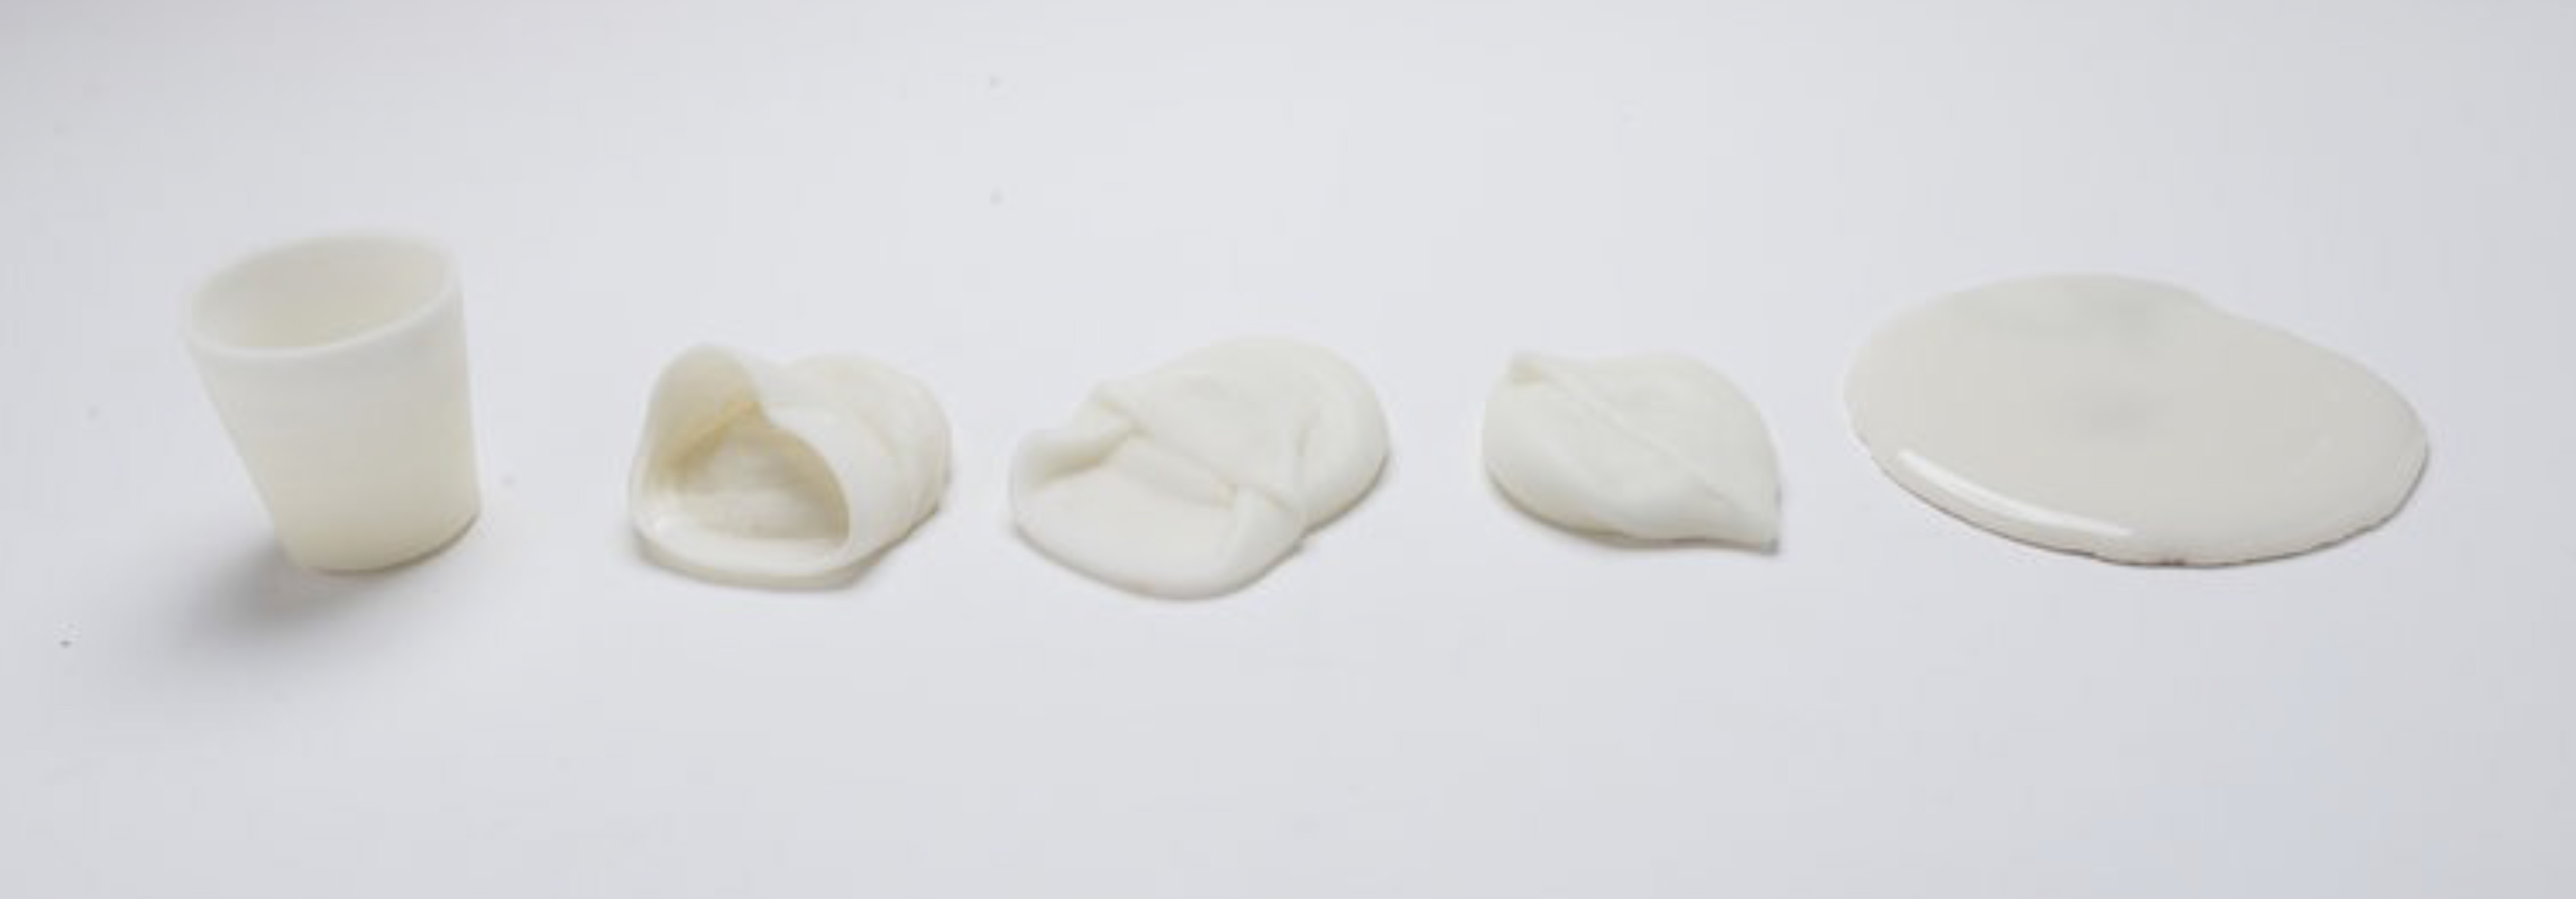
Since these recipes are very close to melting, it is easy to melt your work if you soak the kiln for too long. Additionally, large-scale work has trouble supporting itself during the firing. I made numerous twenty-four-inch coil-built vessels that collapsed under their own weight during the firing at cone 05. I fired subsequent vessels one cone lower until I reached cone 010. At cone 010, the clay is still vitreous but no longer self-glazing. The clay’s plasticity is unique in that it is incredibly plastic in its wet state, feeling just like traditional porcelain.
5. Leather-hard is Silty
When the clay is leather-hard, it has a silty texture and is tedious to trim and carve. Because of the strange working properties of this clay, the addition of macaloid, vee-gum, or bentonite is imperative to the recipes to allow for plasticity. Bentonite is an acceptable cost-saving substitution for the darker self-glazing clays but will sacrifice whiteness and translucency on the lighter-colored clays.
6. Don’t Over-dry
These clays all dry quickly because of the large percentage of non-water-soluble materials. I find this to be a great benefit for small-scale functional work. It is easy to throw a batch of work and then make handles in the same session.
Conclusions after five years (2023)
The more I use this clay, the more I love it. It has proven to be successful, and I stand by these recipes, but would add the following notes:
1. Cool it Slowly
This clay likes to cool slowly. Forms will dunt if the kiln is opened too early. I have dunted numerous kiln loads by impatiently unloading. I recently unloaded a kiln at 350F (a temperature at which I regularly unload) and had numerous pots dunted. Consequently, do not open the kiln until 200°F.
2. Don’t Melt it
I mentioned this earlier, but just to reiterate: this clay is extremely close to melting at cone 05. Cone 06 is a safer fire, but the clay is not as translucent.
3. Sub the Kaolin
These recipes can be easily altered with various substitutions for kaolin. New Zealand China Clay is extremely white but expensive and can be difficult to obtain. Because of this, I recommend English China Clay, Georgia China Clay, and even EPK as adequate substitutes. They are not as white but are fine for colored recipes at substantial cost savings and are usually readily available.
4. Skip the Trimming
Trimming using these recipes became tiresome because of the fast dry time and silty texture. Although trimming dry work is not a deal-breaker for many people, I just don’t prefer it. Using thrown foot-press molds for hand building and throwing makes the process easier.
5. Slip it Up
I prefer to layer slips on the surface of the translucent white clay body rather than build with colored clay bodies from a practical standpoint. This way, I do not have to keep so many reclaim containers for individual colors. I also enjoy the contrast of translucency with colored slips over the white clay body. I am currently experimenting with firing these recipes for slip decoration at higher temperatures. The slip becomes an interesting crawl surface cone 03 to 6 but will flake off if applied too thick.
Draw your own conclusions.
So, should you use this clay? The clear answer is that it depends. The benefits and drawbacks are dependent on the intended use. For production-thrown purposes, this clay is unparalleled. It throws well, pulls well, fast dries, fast fires, is translucent and can self-glaze. On the other hand, with hand-building, it can collapse, melt, crack, and over-dry. A large, hand-built sculpture is far too challenging to deal with (for me) because of the clay’s thixotropic nature and fast drying time. Additionally, the melting point makes the once-firing of large pieces problematic, thus negating the time- and energy-savings of the clay. Although I have not cast with it, just like traditional soft-paste porcelain, it would be extremely useful as a casting slip. I encourage everyone who has an interest in this process to use my recipes as a starting point and draw their conclusions. Please feel free to edit these recipes and share your findings as #lowfireporcelain.
RECIPES – Fire all low-fire porcelain recipes to ^05 with a fifteen to twenty minute hold.
^10 Self-Glaze Soda Clay (2011)
China Clay – 55%
Soda Feldspar – 25%
Silica – 15%
Bentonite – 5%
Soda Ash – 2.5%
Molochite – 1%
^05 Translucent Porcelain #74
New Zealand China Clay – 50%
Frit 3134 – 45%
Nepheline Syenite – 5%
Macaloid – 2%
^05 Self-Glaze Base for Colored Porcelain #87
New Zealand China Clay – 50%
Frit 3195 – 50%
Macaloid – 2%
^05 Translucent Matte Base for Colored Porcelain Slip
New Zealand China Clay – 46%
Frit 3134 – 42%
Nepheline Syenite – 12%
Macaloid – 1%
^05 Colorants - Note: The addition of stains can be added to the above recipes but will reduce the translucency of the clay bodies.
Red
Lobster Red 6026 – 3%
Orange
Zirconium 6464 – 3%
Lobster 6026 - .5%
Yellow
Praseodymium Yellow 6450 - .2%
Green
Praseodymium Yellow 6450 – 1%
Bermuda Green 6242 – 3%
Blue
Robin’s Egg 6376 - .2%
Indigo
Vivid Blue 6306 – 3%
Praseodymium Yellow 6450 – .5%
Lobster 6026 – .5%
Violet
Vivid Blue 6306 – 3%
Praseodymium Yellow 6450 – .5%
Lobster 6026 – .5%
Black
Black Mason Stain 6600 – 9%
White
White Mason Stain 6700 – 5%
NOTES:
Bryan Hopkins, “How Low Can You Go?” Ceramics Monthly, vol. 62, no. 6, June 2014, pp. 58–61.