The Kiln as a Tool, By Svend Bayer
I am mostly described as a British potter. Actually I am Danish, but I have lived long enough in England to feel compelled to start my contribution with an apology.
I am not an academic and my interests in pottery are rather narrow. The subject is huge-too big for me to do it justice, so I intend to limit what I have to say to my present two kilns in the context of this title.
The kiln is, of course, one of several tools used by the potter. Obviously the ultimate aim of all his skills is to make pots with which he is pleased, that he can sell and thereby feed himself, his family and his creative needs.
For the woodfirer the kiln is more than simply a means of hardening his pots. To varying degrees the kiln also decorates his work. Once this part of the process takes on an overriding importance, the usual constraints of fuel economy and minimizing losses begin to fall by the wayside. Obsessive behaviour akin to that of the addicted gambler takes over. I have worked through the entire spectrum from my first kiln, a 600 cu. ft. tube kiln which I took great pride in firing to cone 12 flat in just 18 hours, using less than two cords of wood, to my most recent 150 cu. ft. tube kiln I fire for five days and use more than five cords of wood. The first kiln produced thousands of rather bland pots. The latest produces far fewer pots, many more seconds and wastes, but for my present taste, also some really exciting pots covered with the evidence of the firing process. The two kilns are separated by some 25 years and meet entirely different needs.
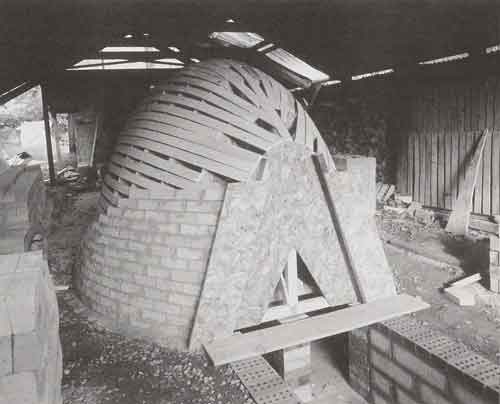
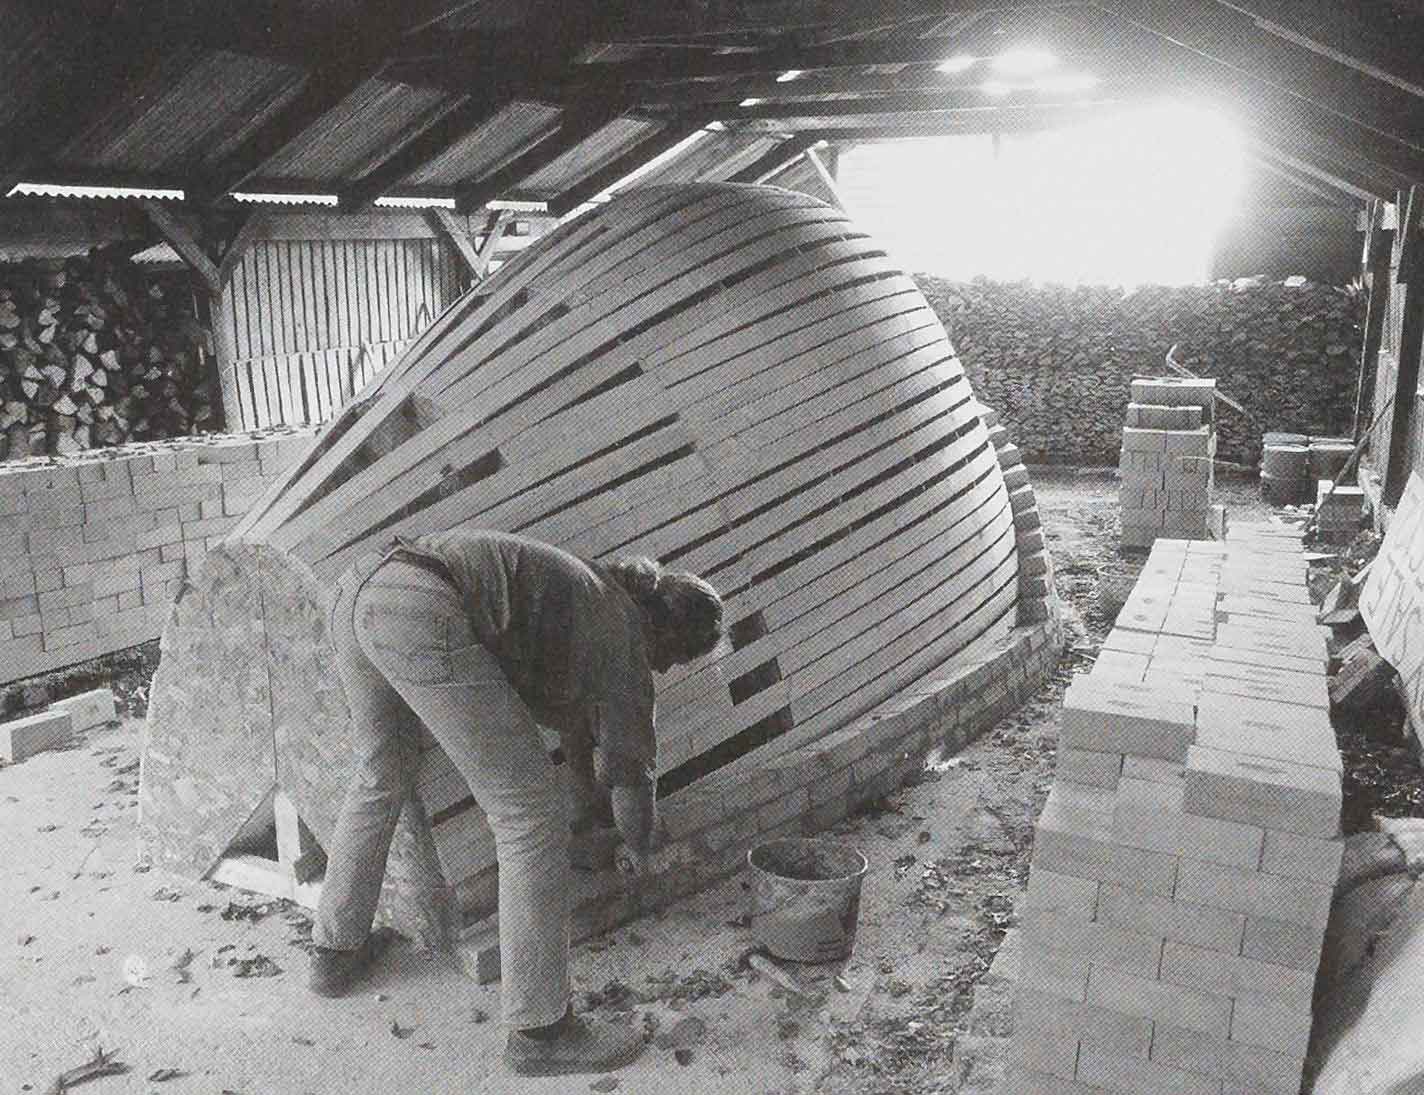
At present I have two kilns. The oldest kiln's design is based loosely on the remains of Sawankolok kilns I saw in Thailand in the early 1970s. It was their shape that captured my imagination. It is like a great pear sliced in half and lying on its side on a slight incline. At the fat rounded end is a deep internal fire pit. The chamber begins at the widest part of the pear and tapers to the narrow end where it exits into a round bottle-shaped chimney. The old Thai kilns are gorgeous- they consist entirely of curves and correspond exactly to the shape of a flame.
Five years ago I pulled down my 800 cubic foot kiln (it took seven weeks to go up and twenty minutes to come down). Cheap imports from the Far East made it seem unlikely that I could continue to make a living from my large woodfired stoneware garden pots. Also, I longed for a smaller kiln to play with, but most of all I really wanted to test my building skills on this curvaceous beauty-l built it almost entirely for aesthetic reasons.
Unlike the old Thai kilns, my 300 cu. ft. version has a catenary arch extending to the floor, side stoking holes, and because it is built on the foundation of the previous much larger kiln, the chamber is joined to the old chimney by an 8' x 2' x 3' tube.
Initially I packed and fired this kiln exactly as I had the previous kiln. I had two rows of shelves behind the fire pit on which I stacked domestic pots on wads. These two rows were separated by a 6" stoking space. Behind them were rows of large pots stacked rim to rim with a minimal amount of room for side stoking, and in the tube were four or five medium-sized jars fired on their sides.
The firings followed a pattern: 24 hours to cone 06 at which point reduction was started. A further eight hours to cone 12, followed by 3-4 hours of side stoking to take the rest of the kiln to cone 12. The deep fire pit meant that no embers fell back onto the foremost pots. Gradually I increased the firing times to 72 hours. Mainly I got more ash on the pots and better colours. Then I began to fill the space between the two rows of shelves with tumble-stacked pots and to side stoke this area for some eight hours before going back to the front of the kiln and taking the whole kiln up to cone 12. This part of the kiln began to produce really exciting pots.

When I returned to England, I decided to build another kiln on a different site. This is a 150 cu. ft. tube kiln, 16 feet long with a 6' x 42" catenary arch. It has a sand floor and the brick firebox floor is at the same level to encourage embers to pour back over the setting. The kiln is stacked with 4 rows of shelves separated by 12" of side-stoking space. These areas are tumble-stacked. I usually have three largish jars at the back of the firebox, and the shelves are tightly stacked right up to the arch. I use as few shelves as possible and stack pots on top of each other. Alternatively, I have large pots where the front two rows of shelves are.
I fire to cone 9 in about thirty hours and then start to side stoke, usually with finely split ash filling up the first side stoke area before moving on to the second and third and then back to the first. I do this for about 70 hours, each section burning down as I stoke the next. Finally I go back to the front, which has reached about cone 11, and stoke it to cone 12 flat before commencing light side stoking to take the rest of the kiln to cone 12. The total firing time is 110 hours.
More than any other kiln I have built, this last kiln was built for a specific type of firing-to maximize contact between flame, ash, embers and the pots. I have finally learned to make things easier for myself. The side stoke covers hang from chains, the floor is sand (easy on the knees), there is ample room to move around the kiln, no pit to climb in and out of, and all the wood is cut, split and stacked ready for use. The whole process has changed from a titanic struggle to simply nudging the flame along. Having hated firing all my life, I am finally beginning to enjoy it.
Of course the kiln is a tool, but for me it is much more. I enjoy building them, I like to simplify and I love the shape of a good kiln every bit as much as that of a well-formed pot. The firing process does seem like gambling-l use all these hard-earned resources in the hope of getting lovely pots, and like the gambler I am mostly disappointed. But I get it right just enough to make me want to go back for more.
Web Editors Note: This article originally appeared in Volume 28, Number 2, June 2000. This is one of several articles adapted from presentations deliverd at the 1999 International Woodfire Conference. You can read the rest of these articles here.
